Grow Your Own Wedding Part 1

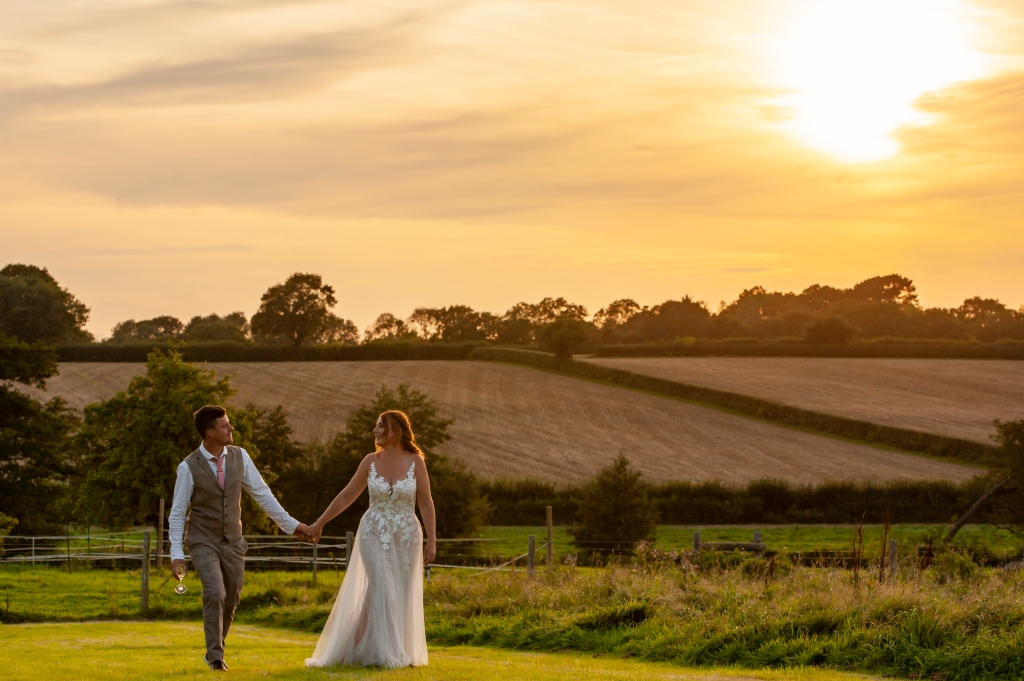
When we got engaged back in 2019, I decided I wanted to literally grow our own wedding, the flowers, decorations, wedding breakfast, every detail, even the confetti. Some would call it madness; I saw it as a labour of love and a commitment to our future. Creating a truly unique day that was made with our bare hands is exactly how I pictured it and whilst everything didn’t go to plan, a lot of memories were made. It was perfect for us.

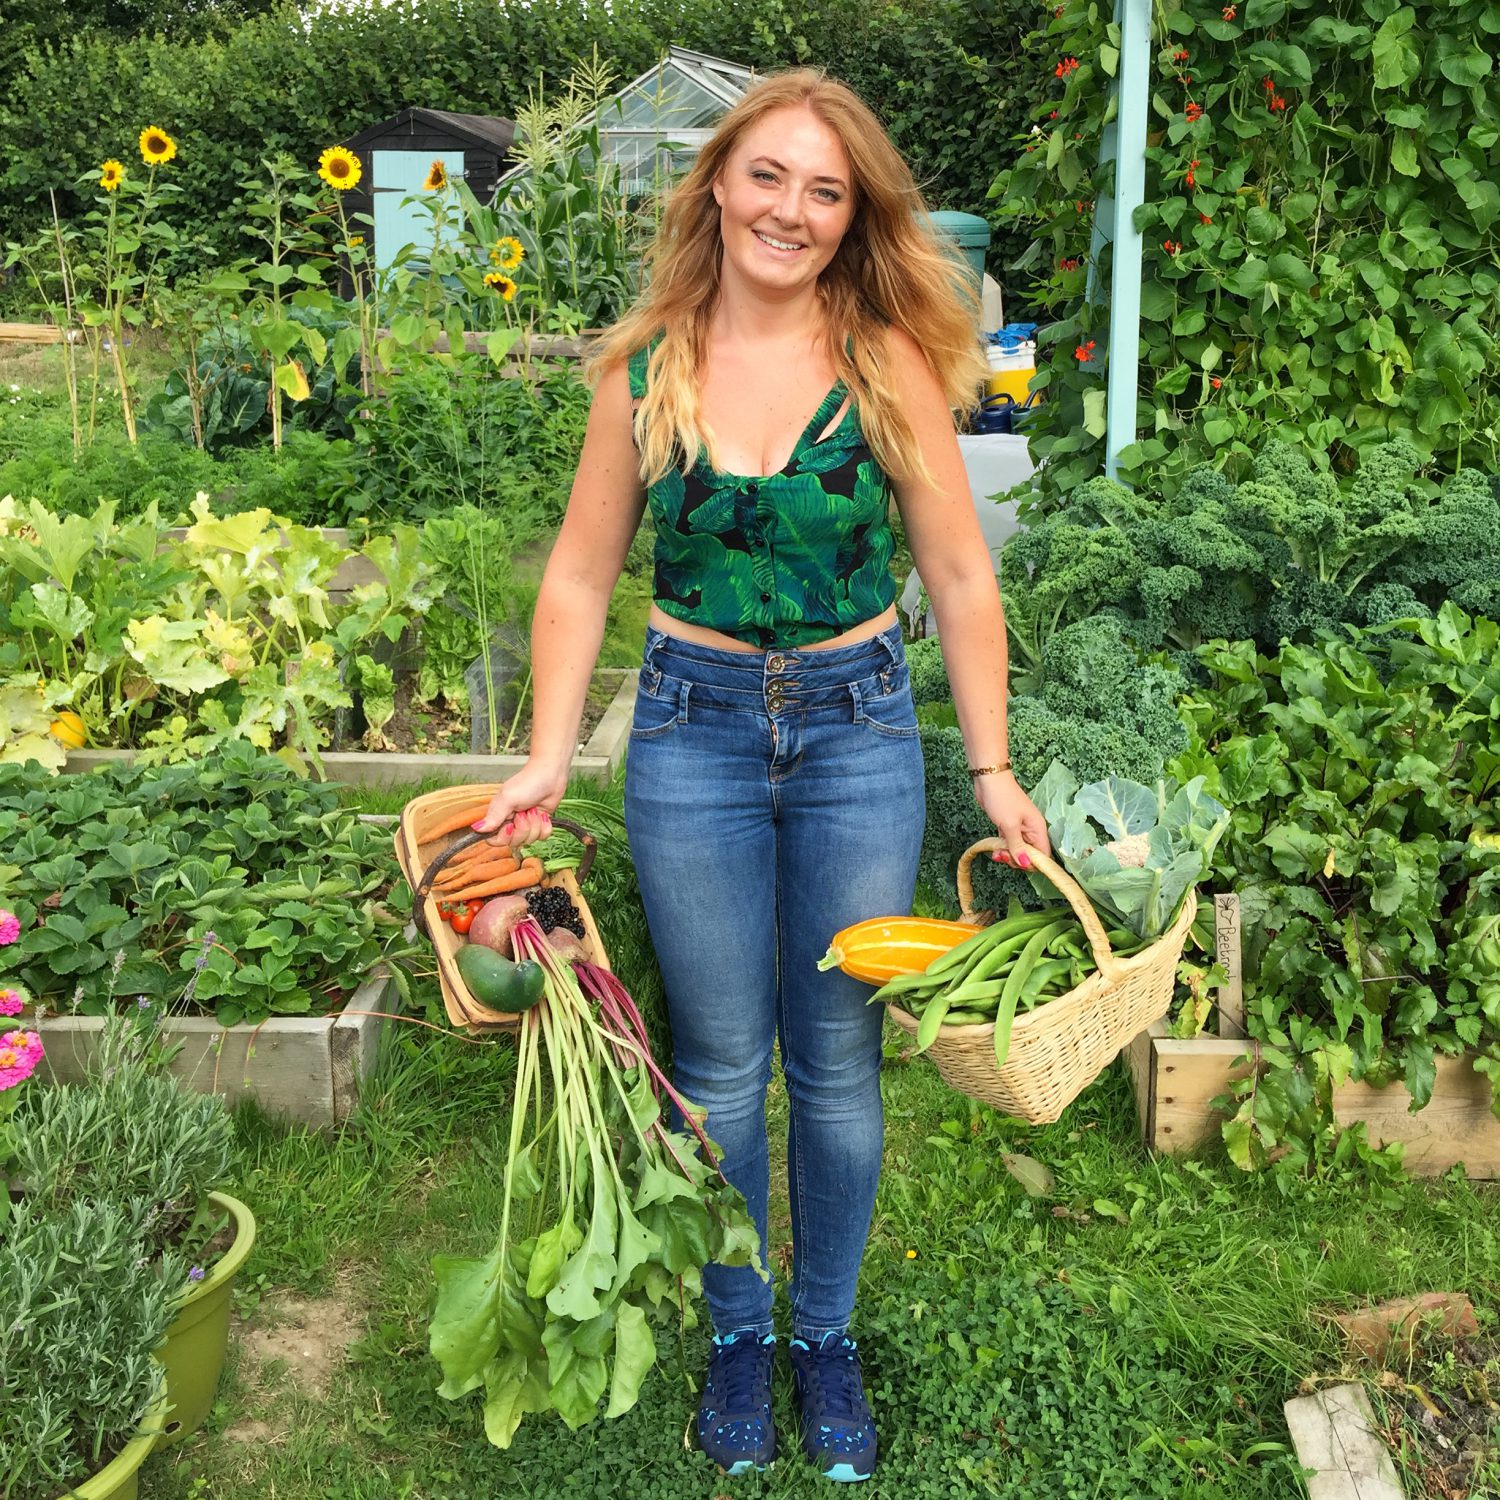
While I am no expert when it comes to growing flowers, vegetables are definitely more my forte, I want to share some key lessons I learnt and give you the confidence to grow your own as it is one hundred percent achievable. But believe me when I say it is a lot of hard work, however you can tailor your growing process to be as in depth as you like.

Growing anything is incredibly rewarding so you can scale it up or down depending on time commitments. You could keep it simple and grow your favourite flower for your florist to add to their supplies. Or you could decide to grow and arrange an element of the wedding like your bouquet or the button holes, leaving your florist to take care of the other elements. Whilst growing the flowers and foliage is one thing, be prepared to arrange them all too. I didn’t look into the option of having a florist arrange my flowers, however I can imagine it would be a grey area that florists may not want to commit to. Do what suits you, your budget and your timescale.

Here are some overall tips I learnt along the way:

1 – Be open minded with your colour scheme. Whilst swooning over images online and carefully curating the perfect colour scheme is a great idea. Know that the varieties you buy may be a slightly different shade to what you were expecting. If you’re growing in the one season, you may not realise this until weeks before your wedding when its too late. I will always recommend white varieties to fill an arrangement with only a few core colours.

2 – Have a back up plan. While you can plan to hundredth degree, something can, and in my experience will always go wrong. For our wedding I grew a beautifully scented rose called Desdemona. In the years before the wedding it had always flowered in September, even David Austin advised it would flower in September. Yet the summer of 21 threw every type of weather in quick concession. The plants didn’t know if they were coming or going and the rose flowered in August, two weeks too early. My back up plan was an online wholesalers however I was always prepared to run down to my local supermarket the night before the wedding if the worst should happen.

3 – Don’t fight mother nature. One of the first decisions we made when planning our wedding was the date. And guess what, the date was based on when the flowers I wanted would be in bloom. It might be an unusual approach but it was a priority for us. We are so used to seeing bouquets in supermarkets and florists offering beautiful combinations of flowers that are imported in to the UK. When growing your own flowers, you have to grow with nature. If your dreaming of growing Peonies for your August wedding, think again. While you may be able to delay flowers for a few weeks, be realistic in what is achievable.

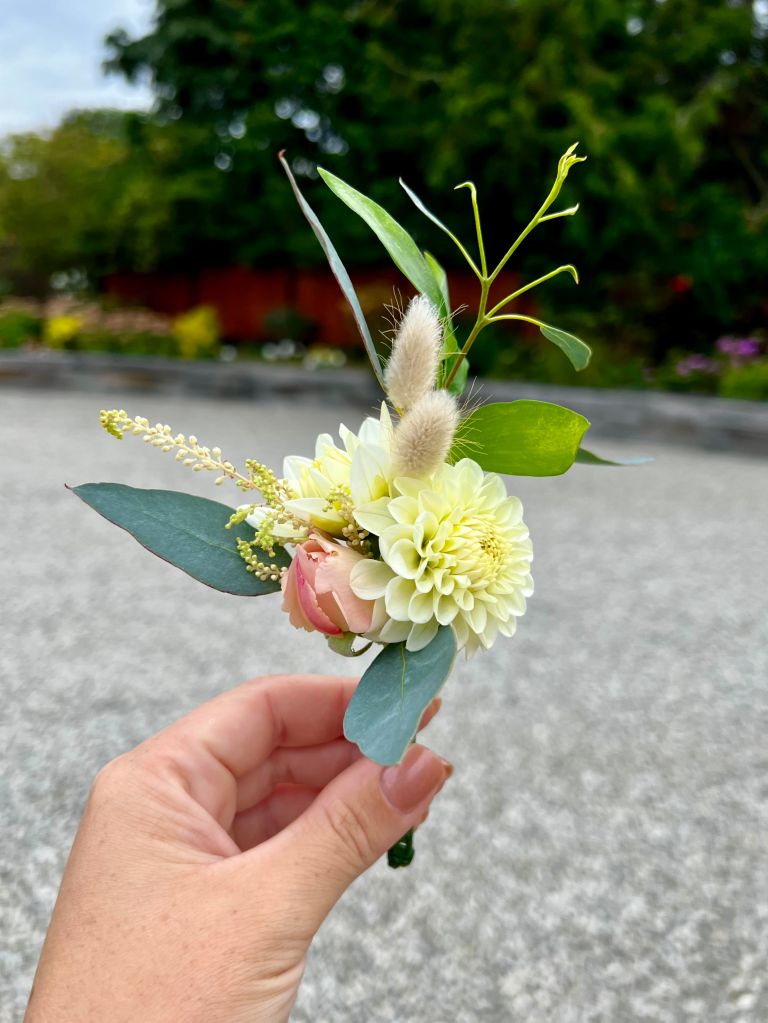
4 – Flowers are just one element of your bouquets and floral displays. The main bulk comes from foliage which typically makes up two thirds of an arrangement. All though your eyes are drawn to the beautiful flowers, the foliage ties everything together and provides textural depth. Most foliage takes time to grow which is where you may want to call on family and friends and see what they have growing in their gardens. From my garden I used Rosemary, Pittosporum, Salix ‘Flamingo’ and Bay. Thanks to covid postponing our wedding I even had a generous amount of Eucalyptus that I had grown from seed. Grasses are equally useful like Pampas, Bunny Tails and Panicum Elegans ‘Frosted Explosion’.

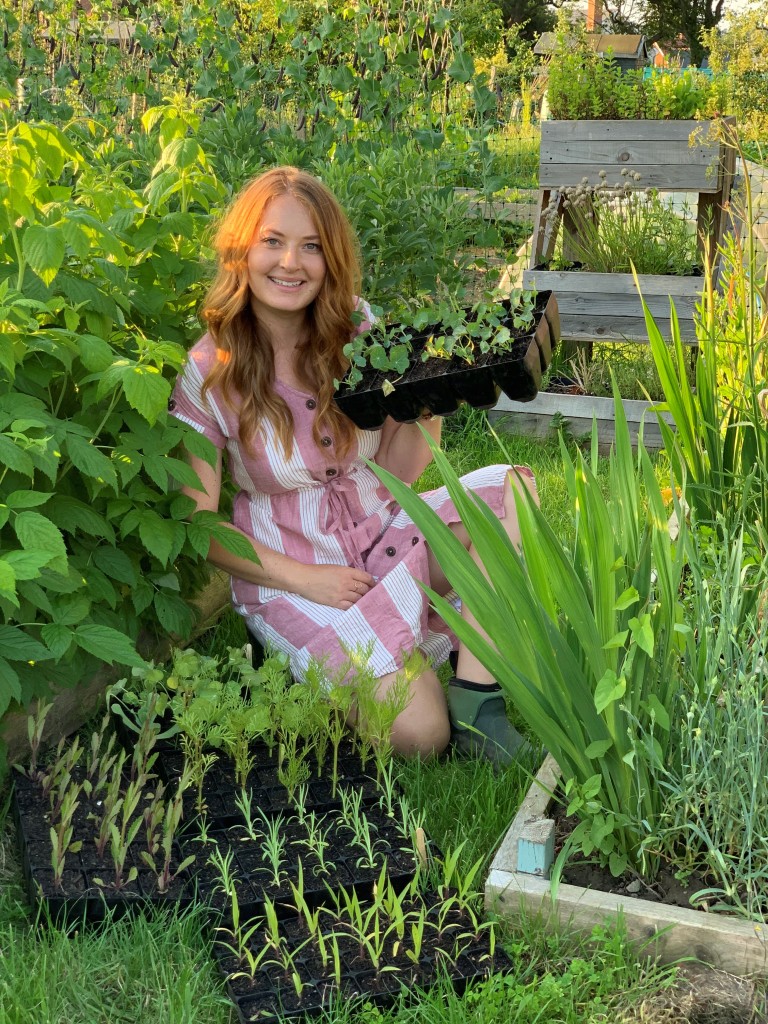
5 – Grow as much as you can. Growing your own flowers can be very unpredictable. Some plants might fail due to pests, weather or disease. Some may flourish and provide you with most of the flowers you require. It’s hard to predict so the best thing you can do is grow as many as you can within the space you have whilst following plant spacing. If growing by seed, successional sowing is key and covers all bases if a plant flowers earlier or later than expected.

I feel like I could write a book on this topic, so I will be condensing everything into a series of blogs. These are the topics I will cover:

Part 2 – Planning, what flowers to choose and how they will be arranged.

Part 3 – Growing your flowers, successional sowing and getting the best out of your plants.

Part 4 – Timing for perfect blooms, when to cut, condition and arrange.

Cucumber Pickle

Here’s my take on a bread and butter pickle! This is a super simple recipe makes a sweet pickle that will last for a year, perfect for using up a glut of cucumber. If you don’t like your pickles so sweet, reduce the amount of sugar in the recipe. Likewise, you can mix up the herbs and spices too! I love to add the pickle to sandwiches, rice dishes and even add the pickle liquid to a yoghurt dip!

IMG_0279

Ingredients:

1.5 kilos of cucumber

500g onions

80g sea salt

500ml cider vinegar

350g granulated sugar

2 tsp mustard seeds

½ tsp ground turmeric

5 whole cloves

1 tsp coriander seeds

2 tsp fennel seeds

1 tsp ground mace

1 tsp whole pepper corns

1 tsp dill

IMG_0127

Method:

  • Wash your cucumbers and thinly slice along with the onions. I’d highly recommend investing in a food processor or mandolin to speed up the cutting, especially with big batches. If your cucumber skins are tough you can peel them first. Likewise, if you’re not a fan of the seeds, you can scoop them out.
  • Place the sliced cucumber and onions into a big bowl and cover with the 80g of sea salt. Give it a good stir to make sure everything is covered in the salt. Leave somewhere cool for 24 hours.
  • Once 24 hours has passed, empty the contents of the bowl into a clean, soap free sink. Fill the sink with water and mix around to wash off some of the salt. Open the drainer and leave to drain.
  • In a large saucepan, add the cider vinegar, sugar, herbs and spices. Slowly heat until all of the sugar has dissolved. Now turn the heat up and bring to the boil.
  • Whilst your pickle liquid is coming to the boil, take handfuls of the cucumber and onion, squeezing out all the water. Take your time to squeeze every drop out. Return to the bowl.
  • Now it’s time to sterilise your jam jars. There are a few different methods of doing this, I start by washing my jars and lids in hot soapy water. Then I heat up the oven to 100 degrees and place the jars and lids on the wire shelf in the oven, turning upside down.
  • After 10 minutes your jars should be sterilised and ready to fill. Pack the cucumber and onion mixture into the jam jars, leaving a cm at the top.
  • Take the pickling liquid off the heat and pour over each jar, going back to top them up as the air bubbles are released. Once full, place a waxed disk on top to seal the mixture and screw the lid on tightly.

These jars will last for 12 months in a cupboard. Once opened, store in a fridge.

Cheesy Stuffed Summer Squashes

I love to grow courgettes and patty pans as they are so versatile in the kitchen. Picking them at different stages gives you different textures and more ways to cook them.

As much as we love to grow them, they can be prolific and before you know it, you’ve got a glut on your hands. Then your faced with these huge squashes that you have no idea what to do with.

3F6E1004-3D0B-4BE3-A247-2AC20B507762

If you’ve harvested large round courgettes or patty pan/scallopini, don’t fear. Here’s a family recipe that my mum wrote out for me to share with you all! It can even be adapted with quorn mince or pulses to make it veggie! If like me, you try to cut down on meat consumption, substitute some mince for finely chopped mushrooms and carrots! Plus it saves those precious pennies too!

Stuffed Patty Pan or Courgette:

Serves 4

500g minced beef
1 large onion
3 teaspoons of mixed herbs (dried or fresh)
3 tablespoons of tomatoes purée
100g grated strong cheddar
5 tablespoons of double cream
1 Knorr beef stock cube
Salt and pepper
Oil
Patty pan or round Courgette (one per person or if really large, can be cut in half when served)

Finely chop the onion and fry in a couple of tablespoons of sunflower or rapeseed oil. Brown lightly, then add the beef and quickly brown. Add the purée and a couple of tablespoons of water and mixed herbs. Add stock cube that has dissolved in a little boiling water. Season and cook for a few minutes.


Cut the lid off the Patty Pan/Courgette. Scoop out the seed and add half the cheese into the mince and mix. Spoon the mince into the Patty Pan and replace the lid. Mix the remaining cheese into the cream, season and after making a tin foil bowl in a oven tray for the Patty to go in pour the cream topping on the top. Bake in a hot oven 200 degree for about an hour. Test with a knife or skewer to see if it’s soft.


Serve with freshly minted potatoes. Can be cooked in advance and reheated.

Tip
Double up ingredients and freeze the rest of the mince for another meal.

3FC1E745-8F3A-4877-8A42-511E28EB7DA2

Composting – Thermo Wood Composter

Composting is such a vital part of gardening, especially growing you own food. Whilst ornamental plants don’t take a huge amount from the soil, the same can’t be said for fruit and vegetables. Not only does it make sense for us to be giving back to the soil, but also to reduce our waste. Composting at home can reduce your household waste by up to 30%.

My parents have brought me up with composting since a young age, so it has become ingrained into daily life. Its something I have taken with me when I moved out from my childhood home and it is a big aspect at the lottie. Garantia asked me to try out their new Thermo Wood Composting bin and discuss the benefits of composting as part of launching their new product.

IMG_0882

As well as composting at home, the lottie and especially the girls, have been a big contributor to the compost heap. Because of the increase in material from working a 450sqm plot and having the girls on my plot, I needed something big enough to take on the task. Over the years I have tried lots of methods, each with different successes.

The easiest, I thought, would be one made from pallets. It worked okay in terms of composting but it also encouraged unwanted visitors. Because of the amount of available food on the allotment site, and the girls, rats became a problem pretty quickly. Because the composting heap is open, it gave the rats the perfect opportunity to set up home inside. In truth, it was a nightmare. It also dried out during the summer and got drenched in the winter as it was open.

Thankfully I won’t have that issue with Garantia Thermo Wood Composter, as not only is it enclosed, but it also has a grating accessory which prevents rodents from having easy access. Yet it still lets in moisture and worms from the ground below. My other intention for using a wooden pallet compost heap, was to reduce my use of plastic. However, the Thermo Wood Composter is made entirely from recycled plastic, which makes me so happy. Not only is it made with recycled materials, but it’s made in Germany, meaning is hasn’t been uneconomically shipped in from Asia.

IMG_0889

When I received the Thermo Wood Composter, I was really impressed with its sturdy walls, unlike some cheap flimsy ones I have experienced in the past. Perfect for me as I am pretty heavy handed and easily break things. Its wood effect panels in the dark grey go perfectly with my garden décor and something I won’t be hiding in the bushes. Unlike most composters on the market, because let’s face it, the traditional standard ones are pretty damn ugly!

It was super easy to construct and only took a few minutes. Everything clicks together with a satisfying “click”. No tools required and I even managed it with one hand while I filmed and photographed the process with the other!

IMG_6971

Next, I had to decide where to position it. You ideally need it to get sunlight for some of the day. Full sun means the contents might dry out too quickly, yet full shade means it won’t create enough heat to break all the organic material down. I positioned mine at the edge of my plot, out the way and in the cover of a hedge line. This spot gets shade in the early morning and late afternoon, so it’s perfect. The positioning will depend on what type of composting method you are using. The great thing about buying an enclosed composter like the Thermo Wood Composter, is that it is totally enclosed meaning you can control the moisture levels with ease. No drying out and no rain flooding the composter.

I began by lining the bottom with a few layers of ripped cardboard and twigs I had been saving. The cardboard will trap all the moisture and keep the contents damp which is the perfect condition for the worms, insects and microorganisms to help decompose the material. Whilst the twigs will give some aeration and drainage. Lots of people ask what I do and do not put into the compost heap so here is a list.

Do:

Vegetable and fruit scraps including citrus peelings

Toilet rolls

Contents of the hoover

Vegetation from the allotment

Grass Clippings

Cardboard like toilet roll tubes

Animal bedding like straw, hay, wood shaving and wood-based cat litter

Wool

Hair

Tea Bags

Coffee grounds

Broken egg shells

Paper

Wood ash

Small branches

Used compost from pots

Annual weeds that have not yet flowered

Leaves

Do Not:

Large woody plants

Perennial weed roots and flowers

Meat scraps

Potato peelings

Diseased Plants

Leftover Food

Bread

Bones

Litter

I’m sure there’s more to add on the list so please do share what you put in the compost bin in the comments below. You want to add a nice mix of what gardeners call brown and green waste. Green waste is things like vegetable scraps and grass cuttings, where as brown is cardboard and straw materials. The mix of both will give a healthy environment for all the good microorganisms to thrive. Its best to chop any matter down into as smaller pieces as you can. Ideally you want to layer the material gradually over a long period of time.

Just as you think your compost bin is full, you’ll find within a few weeks, the material has sunk back down. Its best to give your compost heap a turn every now and again. I use a hay fork which is perfect for lifting the material high and getting some extra aeration into it. The doors on the Thermo Wood Composter give a wide opening to give you access for adding organic material and too turn with a fork.

If you’re new to composting, don’t be scared! Enjoy the process and you’ll learn lots along the way! At the end you’ll be rewarded with rich compost that will feed your fruit and veggies all the nutrients they need! All for free too!

0% Stress, 100% Happiness


When I first started growing my own food, I was driven by wanting to know where my food came from, reducing the air miles it travelled, and being 100% organic. In essence, I wanted to be in control. However, after getting my lottie, I found so many other benefits to growing my own food, both physically and mentally. The lottie is my haven and refuge from the stress and strain from modern life. As the world becomes increasingly busy, your time in demand, gardening is the perfect opportunity to take a step back and find your inner happiness.

IMG_9023

I teamed up with Fiskars this spring, promoting its fantastic campaign “0% Stress, 100% Happiness” which is something I am really passionate about. Approximately one in four people will experience a mental health problem each year. During those dark days you can feel isolated, unhealthy and with no way out. We all have our vices and for me, mine is gardening. The energy I created when digging my new wildlife pond not only was like a workout in itself. It also releases any stresses you’ve built up on a pile of dirt, armed with nothing more than your trusty spade and the birds singing around you.

You’ve probably heard the saying, a bad workman blames his tools, well there’s actually some truth in that. There is nothing more frustrating than digging away, to suddenly find your spade head snapped off. Or your loppers just not good enough for the job, so you end up hacking at the branches in anger. That will not achieve happiness! As part of the campaign, Fiskars is so confident that its products will help create 100% Happiness, they are offering a voucher or your money back after 60 days of using the easy to use tools. To find out how you can benefit, click this link.

IMG_9401

Fiskars challenged me to find 0% Stress, 100% Happiness in my lottie, so this spring I have been working on introducing more wildlife into my plot, making it a haven for not only myself, but all the wildlife around. I find listening to the sounds of the birds and the bees flying around very therapeutic. It’s hard to explain the power of immersing yourself in the outdoors, has on your wellbeing. There are a few things I am doing to increase the wildlife that visit, one is to provide a food source and the other is to provide habitats.

I have begun by making a wildlife area behind my shed. This was an unused space due to the previous plot owner using it as a rubbish tip. It was solid compacted soil, filled with all sorts of rubbish, netting, bottles and even a buried wheelbarrow and wardrobes. For this ground, I needed something tough but lightweight as it was going to require a lot of digging. My Fiskars Xact Digging Spade was perfect for the job and was really comfortable to use.

IMG_9404

Next up was to cut the overhanging branches back from the area, exposing the ground to more sunlight for the planned pond and bee friendly plants. My lottie is lined by a thick mixed hedge which is great for all the birds and wildlife that take shelter in it. It can get a bit unruly so I use my Fiskars PowerGear X Loppers to keep it under control.

IMG_9513

The area was finally ready to begin digging the hole for the pond! I followed information from The Wildlife Trusts which was really useful. The pond ended up becoming egg shaped which I guess is pretty perfect with the chicken theme! The deepest point is 80cm which is perfect for overwintering frogs and toads. I made a shallow area at one end to attract all kinds of wildlife. When the shape and levels were all dug, I lined the whole thing with sand. I’m using a second hand butyl liner so I wanted to ensure that nothing in the ground would pierce the liner.

My dad helped me drape the liner over the hole and then I began to fill it with rainwater. The water pushed the liner into place and naturally filled the hole. I wanted to create some nooks and crannies for the wildlife to hide in so I laid some large rocks in the bottom of the pond, and some smaller ones to create a ramp in the shallow end. I salvaged the rocks from a plot neighbours garden and I even had enough to edge the whole pond. You need to give the wildlife an escape route so ill be adding a wooden plank that has chicken wire wrapped around it. The chicken wire provides a bit of grip to whatever animal is walking up the plank.

Last but not least, was some plants! I’m pretty certain I have an addiction to plants, whether that be ornamental or edible. But now I have to add water plants to that list! Plants not only provide another habit for wildlife, but they also oxygenate the water. When I picked up the second hand pond liner, the kind man asked if I would like some pond plants as well. He gave me a beautiful pink lily and some waterweed. Since I’ve added a Scirpus Cernuus grass which will be perfect for insects to burrow in and a Butomus Umbellatus that has beautiful flowers.

plants

Since installing the pond, both my girls and the wild birds have loved it. I currently have a family of blue tits in my bird box and the parents regularly come out for a dip in the pond. I can’t wait to see what other wildlife visits. As well as the pond, I will also be adding a frog house, bug hotel and plenty of flowering plants that the bees and butterflies will love. Not only will they love it, but so will I!

IMG_9455

Chicken Fencing

When I first did some research into getting my girls, I wrote a check list of things I’d needed to prepare. Get a coop, metal bins for their feed and build a fence around my plots to keep them in. Over a year after I got my girls I still hadn’t put a fence up. During the winter it’s not much of a problem as there isn’t much growing on other allotment holder plots. But come spring, it’s a nightmare!

IMG_0690

If you’ve watched my stories you’ll know what I mean and if you don’t, check out my “Hen Adventures” highlights in my bio. There you’ll find Peanut going for her daily walk around the site, with me running after her, while all the rest of the girls destroy my Brussels sprout seedlings. Thankfully they grew back and more importantly it wasn’t someone else’s seedlings!

IMG_0151

People often ask how I cope with the girls eating everything, and while they are usually pretty good, they sometimes give into temptation. If I see one eating something they aren’t supposed to eat, I’ll call their name like a naughty child and sure enough (all except Peanut who just ignores me) will look up, give a sheepish look and stop eating. If they are being really stubborn and won’t stop, I shake the mealworm bag and they instantly come flapping over.

IMG_5330

The main crops they eat are leafy greens and cabbages so I always try and fence these off straight away. However I can’t fence in everyone else’s cabbages, so I really needed a fence to keep them in my plot. No matter how much of an eye you keep on them, you still turn round after a split second to find them all running off to a few plots away where someone’s digging and uncovering worms.

I expected to get some pissed off reactions from other plot holders, but most enjoy the girls visiting and have a little chat with them. That being said I would feel incredibly guilty if they ate someone’s crops. I’m having to be on constant alert while I’m trying to work which isn’t ideal. They are literally like children where you have to keep them entertained with something like digging, otherwise they go looking for something exciting to do.

I’ve seen to many shoddy chicken wire fences to know not to go down that route! Instead I planned to install a chain link fence with concreted posts around the 50m perimeter which would have been a huge amount of work. I’d also have to rope in all my family to get it done which was a lot to ask, which is why I put it off as long as I could. That was until Omlet suggested I use their new chicken fencing.

IMG_5410

Instead of digging countless 2ft deep holes, mixing concrete, tightening the wire across the posts and spending around two days with four of us. I ended up spending half a day with my partner (who had a broken back) installing the Omlet fencing.

IMG_6897

We spent about an hour putting all the poles together and getting our head around the construction. Because I wanted the built in gate half way along the fencing, we made it way too complicated in our heads than it needed to be. We decided to trust the instructions and after the first few poles, we got into the flow of it and it went up in no time. Last week it was even put to the test with storm Freya giving it a battering but I’m pleased to say it’s absolutely fine.


img_6902.jpg

I’m so impressed with it and the girls haven’t minded one bit! They still have a good 450sqm to roam so I think they will be okay! It’s already made my life so much easier. I’m no longer having to keep looking out of the greenhouse while I pot on seedlings to see where they have got to! Omlet currently have a spring sale with 10% off everything!

IMG_3232.JPG

Thank You Omlet!

The beginners guide to growing your own – Choosing the space to grow in and how.

First up I’m going to talk a bit about allotments, but if your growing in your garden or a few pots on the windowsill, skip down a couple of paragraphs where I talk about preparing your area and different growing methods. First things first, what is an allotment. I know this sounds like a silly question, but when my parents suggested I get one back in my early twenties, I had no clue about them! Plus, I get lots of you asking from overseas.

IMG_0374.JPG

An allotment is a site of land normally owned by your local council. I googled my local council online where I found an email address to contact about applying. These sites can also be privately owned which can come with their own rules so have a good read through the contract before signing. I now rent two plots from the council for £45 a year and I pay this every January. In essence I am basically renting the land. People ask why would you not just grow in your garden? At the time I lived with my parents who were getting fed up of my butternut plants everywhere, then I moved to a flat with no garden. Even now I own a house with a garden but its quite small and I want to keep it for ornamental plants. Aside from those reasons, another benefit of getting an allotment, is the community. I have met so many different people down my site and its great to interact with people that share your passion. You find out lots of tips and can have friendships with people 50 years your senior which I don’t think I’d get from my garden.

Normally there is a waiting list but sometimes you can get lucky. I have two sites near me but I choose one that was the closest to my home and has a corner shop next door in case you forget to bring milk for the tea (priorities). I had to wait six months and was then given the choice of a few plots. When I went to view my options, some other plot holders were on the site and recommended getting a plot near the gate as the other end of the site always gets waterlogged. The plot in the waterlogged area was in much better condition, but I choose the hard work and got the plot near the gate. While the other end of the site is waiting for the water to drain away from their plot in spring, I’m out there planting my seedlings, so I am glad I made that decision.

IMG_7165.jpg

Back to general gardening. Once you have chosen your plot or growing patch in your garden, don’t rush into anything. Planning will become your best friend and the place to start is by looking at the sun. See which way your plot faces and watch how the light falls over your growing area throughout the day. This will then give you an idea of where to place your growing beds and where to put crops. For example, you don’t want your sweetcorn blocking out all your morning light to the rest of the crops because you planted them in front. It’s just common sense and you will probably realise it without even thinking about it, although we’ve all made the sweetcorn mistake!

iuion.jpg

With growing in a garden, it can often be more problematic with fences and houses usually blocking out some of the light. This is where you can get creative, saving your prized sunny area for those crops that love it, like squash, tomatoes and chilli. You can also use pots which you can move to the best spots that you might not be able to dig up, like a patio or decking area. Carrots work really well in deep pots and lettuces are great too as its harder for the slugs to reach! You can also use shade to your advantage by planting leafy crops that would normally wilt in full sun.

IMG_3142.JPG

After you have thought about the light, next up is soil. Now in all honesty I don’t appreciate the science of soil enough! Different plants like different soil which make sense, but its hard to find out what likes what. Whatever you decide to grow that you’re not sure of, I find google is your best friend, especially sites like the RHS website which gives you info on each variety. As a beginner I would concentrate on getting your soil right for acidic loving plants like blueberries. This is really easy to do if you grow them in pots as you can use an ericachious soil.

jhguyg.jpg

Another vegetable I would get the soil right for is carrots as its normally the reason for forked, stubby roots. Last year I started a fresh carrot bed by constructing a 60cm high bed, two boards high (which prevents the carrot fly). I filled this with multipurpose compost and sand, around half and half. The sand was general builders’ sharp sand so nothing fancy. After the girls helped me mix it in, I sowed some carrots and had a brilliant harvest. Carrots hate stony, manured and heavy soil. If you don’t have the time or space to dedicate a whole bed to carrots why not try growing them in deep pots. They work really well as you can control the soil and place the pots high up away from carrot white fly.

IMG_7242.JPG

Personally, I would say not to concentrate on the scientific side of soil for the first couple of years of growing. Its fairly easy to find out what your soil is lacking with a soil testing kit, but it’s a lot of work to then rectify your soil. There is so much information to take on when you start growing your own so let’s not make things more complicated than they need to be. Generally, most crops will do fine in most soils (aside from the crops mentioned above), but if you fail with a crop and there’s no other explanation of what went wrong, test your soil. Whether you have sandy or clay soil, its always best to try and introduce organic matter in autumn or spring. Top dressing a bed with homemade compost or well-rotted manure will do the soil wonders. Next time I’ll be talking about the growing methods I’ve tried and how to prepare your ground for the year ahead!

2019 Marshalls Partnership!

To everyone that has come here to read what I’ve got planned for the year and to find out what I’m going to grow, thank you for following me on this journey! I’ve got 89 different varieties of fruit, vegetables and flowers planned for my lottie and wildlife patch. This year I’m focusing on growing more varieties, but less of each one. That way my diet will have more variety and I won’t get sick of eating squash 101 ways.

IMG_6824.jpg

As part of my partnership with Marshalls I will be taking over their Instagram page once a month, sharing with you all my top tips and showing what I’ll be doing in my lottie. I’ll be on their page on the 25th of every month so put it in your calendars! Plus, I’ll also be running a monthly competition, win win! Marshalls have kindly sent me all these varieties that I’ve chosen to grow:

Growing List

A lot of these varieties are new to me so its going to be a challenge, but that’s what I love about growing your own. Every year I like to try something different, although I do have my favourite staples. Right now I’m sowing De Monica broad beans which I swear by, as well as Gardener’s Delight tomatoes which is a great all rounder and perfect for beginners. Each week I’ll be sharing with you which varieties I’ve sown and how, how they are growing and when they are ready to harvest!

IMG_6808


Sponsored By Marshalls Seeds

Marshalls logo 2016-CMYK_rev.jpg

How to keep your hen’s happy in the winter!

After going through two winters with my girls I’ve learnt some aren’t phased by a dusting of snow, where as others puff their feathers like a beach ball to keep themselves warm. I sometimes wonder whether 17 months in a heated tin shed (ex battery hens) has made them more susceptible to the cold? Anyway ,here are my tips I’ve learnt to keep them in tip top condition even in the snow!

img_3483

1 – Location

My girls are on my allotment so it’s a big open space with no warm south facing walls to position their coop against. Instead their coop has been moved to the sunniest spot and near to my shed which gives them a bit of protection from the wind. In late spring I’ll move their Eglu back to it’s summer position which gets afternoon shade. They also have a little wind protect from a lavender hedge and strategically placed plant pots!

2 – Food

We all know that corn is a chickens favourite (aside from mealworms of course), but a handful of corn just before bed will keep a hen warm during the night as their body builds up heat digesting it. They also gobble a few mealworms to keep their fat stocks up!

In 0 degree temps I will change their frozen water for luke warm water as an extra morning boost. A yummy treat for my girls is a bowl of porridge! Simply mix plain porridge with some boiling water and they love it, plus it warms their bellies. If you don’t have porridge to hand, mixing their pellets or crumb with hot water is welcomed! I sometimes combine the two so they get the best of both worlds!

img_4207

3 – Coop

I have an Omlet Eglu which is twin walled insulated and is perfect all year round. When it gets to minus temps I also attach the extreme temperature jacket to the coop to make sure they are extra cosy. Any material can be added externally to create an extra layer of insulation, just make sure to weigh it down and keep ventilation holes clear. Likewise make sure any unnecessary gaps or holes are covered to stop drafts.

img_5579

4 – Run

For some reason on really cold days, my girls refuse to sit in the sheltered coop. I mean, I don’t blame them as I wouldn’t want to sit in the dark either. Instead I’ve had to make their run a sheltered place where they can keep warm. I have Omlet’s run covers which clip to the wire run and stop any drafts blowing through. Keeping the floor dry is also a must as the surface will freeze, which won’t be pleasant for your hens and they won’t be able to dustbath. I have covers to stop the rain getting in as well as a woodchip floor which soaks up any moisture. The wood chips get dig out and replaced when needed and this makes a great mulch for your garden!

5 – Bedding

Some people use the deep litter method although I haven’t tried this. In summer I have as little bedding as possible, where as during the winter, it is packed into their coop. I use a layer of sawdust to soak up any moisture, followed by a thick layer of straw. This is changed regularly so there is no damp material left for a period of time. Last winter when we had a couple of weeks of snow I put a thick layer of straw in the run too.

6 – Chicken Jackets

There’s some conflicting advice about jackets and it is not recommended if your hen is growing feathers for a couple of reasons. However my recent experience with Aggie has meant a jacket was needed. With Aggie being poorly she lost a lot of weight. She also hates the cold! To aid her recovery I kept her indoors and slowly reintroduced her to the outdoor conditions. Just as she was ready to go back in the flock a cold spell hit. This is when the jacket has come in really handy! Left on for just a couple of hours in the morning, has given her an extra bit of protection while the temps get above freezing.

img_5644

7 – Eggtracurricular Activities

My girls have a good run around every day. They love to forage for insects and worms which becomes impossible when the ground freezes over. You can give a helping hand by digging a small area (the wild birds will love you too). Or I open my greenhouse where they run in for a bit of shelter and a dig in the raised beds. It’s a nice place for me and Olive to sit, that’s when they aren’t eating my salad!

img_5724
Olives Favourite Seat

If you have any other ideas please comment below and share your wisdom with everyone!

Find what keeps your girls happy and warm during the winter months and they will repay with you lots of eggs come spring! If you want to upgrade your coop this January, Omlet are offering £50 off all Eglu’s by using code EGLU2019!


Chicken Commitments

I have been wanting to share a secret with you all for quite a while now. A few months ago Omlet asked if I would mind testing one of their new products, and to tell you the truth it has been life changing! People always ask me if taking on chickens is a commitment, and even after all the research I did, I still don’t think I was as prepared for the amount of “commitment” they would take. I was a tad naïve and the excitement of beginning my small holding, overtook any concerns.

Image-2

The girls like to get up at first light and for me to have even just an hour lie in, would leave me feeling guilty when I see them desperate to get out of their coop. Every morning would begin with waking up at the crack of dawn. Despite the weather, day or plans, I would still wake up with the sunrise and drive to my lottie. It wasn’t a problem as I loved to see the girls emerge from their coop, sleepy eyed but eager for the day of scratching the dirt and dustbathing. However on those rare occasions you would find yourself dreaming of having a lie in.

Similarly in the evening I would go to the lottie around an hour before sunset, to give the girls a run around, some corn and finally tuck them in for the night. As the year goes by this time would change daily. In winter I would even leave work early to make sure I could put the girls away before darkness. Call me crazy but I would do anything to keep my girls safe and happy. After hearing horror stories of people coming home an hour later than usual, to find a fox had got into the chicken run and killed all the chickens. Those stories are heart breaking. Just like the mornings, I would make sure my evening plans revolved around the girls and sunset.

Image-3

Omlete got in touch and asked if I would mind testing their new automatic door. I literally jumped at the chance! The delivery arrived and I had no idea what to expect, but I was really impressed. The auto door took me around 20 minutes to fit, simply unbolting the roof and screwing it in place. The girls thought this was highly entertaining as they pecked my feet whilst I worked. You could either set it at a time to open and close, or you could set it to 15 minutes after the light quality reduces to a certain percentage. I didn’t expect you to be able to set it so accurately to suit you, it filled me with confidence. I went for the timer program so my girls wake at 7am every morning, when the risk of Mr Fox has passed. In the evenings I set it to close 15 minutes after sunset. I was a tad worried about the door shutting on one of the girls but it moves fairly slowly and gives the girls plenty of warning. Plus it has a “crush detector”, so if anything gets in the way, it won’t close.

Image-5

Image-1

I couldn’t be more impressed with the door. Now at the weekends I can wake up late and go see the girls midmorning. I can go out for dinner and not have to worry about getting home at a certain time. Such a small thing has made such a big difference to mine and the girls lifestyle. I don’t think there are many people that keep chickens purely for their eggs. We all want to give the best life for our chickens, especially as mine have been rescued from a horrible battery farm. So for the girls to have consistency, waking up at the same time every day, having as long as possible to roam around as they please, and then put themselves to bed knowing that they are going to be safe. Is just perfect for us!

I’ll be happy to answer any questions about the door so please do get in touch.